MIT 6.S081 All in one
闲着没事把 6.S081 2021 ~ 2025 年的实验都写了一遍。
Lab0 - 环境配置
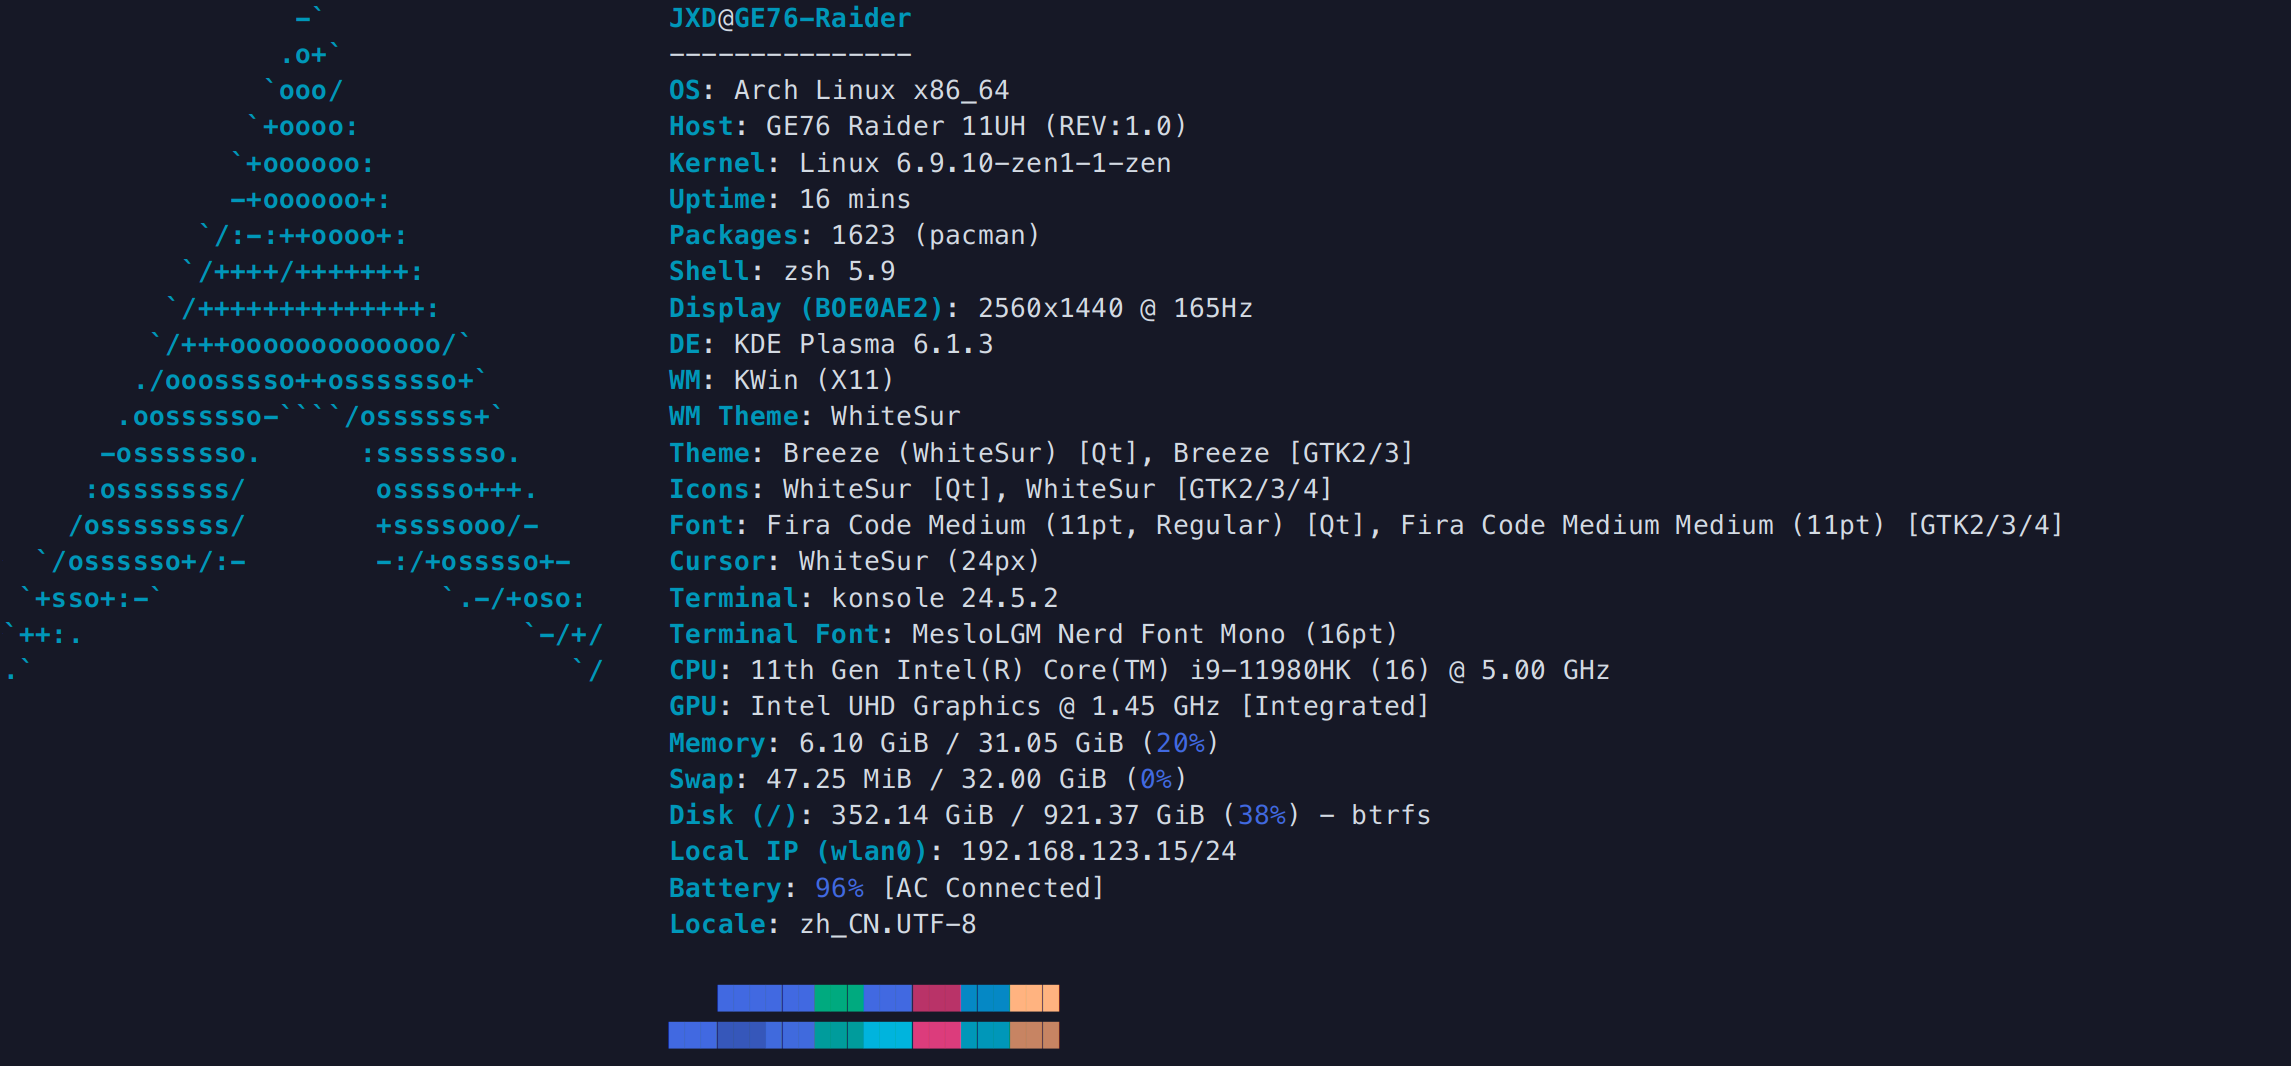
系统为Archlinux物理机,环境如下:
安装依赖
参考:https://pdos.csail.mit.edu/6.828/2021/tools.html
首先安装转义riscv64的包:
1 | |
1 | |
安装 qemu:
图省事安装 qemu-arch-extra-git 就够了。用
qemu 环境比较多的同学可以直接安装
qemu-full
1 | |
编译运行
参考:https://pdos.csail.mit.edu/6.828/2021/labs/util.html
实验用的 xv6 和 github 上的的不太一样,别傻乎乎去 clone github
上的。如果要其他年份的就把末尾的xv6-labs-2021改为其他年份就行。
1 | |
在较早年份的实验中,xv6 默认是 master
分支,里面什么都没有,根据不同实验要求切换到相应分支即可。
1 | |
2021 - 2024
年的实验直接编译会提示各种编译错误。这里只说一下我遇到的,大多都是因为
-Werror 标志 把所有 warning 当
error 处理。图省事可以直接在 Makefile 里把这个
flag 删了。
- 提示
user/sh.c:58:1: error: infinite recursion detected [-Werror=infinite-recursion]
在 user/sh.c 中 runcmd
函数前添加一行__attribute__((noreturn))即可。
- 提示
user/usertests.c:2829:6: error: initialization of 'void (*)(char *)' from incompatible pointer type 'void (*)(void)' [-Wincompatible-pointer-types]
在 user/usertest.c 中将 rwsbrk() 添加一个
char * 参数即可。rwsbrk(char *argv)
2025 年的实验可以直接编译,无须任何改动。
然后运行 make qemu 即可
1 | |
最后出现这几行就说明编译成功了,按ctrl + a, x退出模拟环境。
配置 Lsp
一直使用 clangd 作为分析工具,需要
compile_commands.json 文件来告诉 clangd
编译参数。通过 bear 这个工具可以轻易的生成。
1 | |
xv6 根目录下出现 compile_commands.json 文件即可。
clangd 分析会生成 .cache/ 目录,不应该加入
git 维护的内容中,所以在 .gitignore
文件里新增一行:
1 | |
至此 xv6 环境就配置完毕。
Lab1 util:Unix utilities | UNIX 实用程序
本节实验主要用于入门系统编程,利用系统调用底层工具。根据课程官网的要求,需要看完Lecture 1,阅读完教材第一章\(Operation \space System \space
interfaces\)。
此外,实验手册中的 Hints
很重要,大多数实验跟着提示一步一步实现都能完成。
Sleep (easy)
实现 sleep ticks 程序。即在终端输入
sleep 10 可以让内核“睡眠” \(10\) 个 ticks。
首先按照Hint-1的提示看一眼user/echo.c是什么,可以看到下面的一段代码:
1
2
3
4
5
6
7
8
9
10
11
12
13
14
15
16
17
18```C
#include "kernel/types.h"
#include "kernel/stat.h"
#include "user/user.h"
int main(int argc, char* argv[]) {
int i;
for (i = 1; i < argc; i++) {
write(1, argv[i], strlen(argv[i]));
if (i + 1 < argc) {
write(1, " ", 1);
} else {
write(1, "\n", 1);
}
}
exit(0);
}
argc存储终端传入的参数个数,argv存储传入的参数的具体内容。例如运行
echo hello 命令,argc 等于 \(2\),argv 分别为
"echo" 和 "hello"。
xv6 内核已经实现了 sys_sleep
系统调用(见kernel/syscall.h 及
kernel/sysproc.c)。直接处理参数然后调用
sys_sleep 即可。
1 | |
pingpong (eaxy)
练习 fork 和 pipe 以及
write/read 系统调用。和课程上 \(pipe2\) 的例子差不多(see pipe2.c)。
注意管道是单向的,所以需要两个管道来实现父子进程的双向通信。
养成好习惯,不用的管道立刻释放,不占用 fd。这在
primes 实验很重要。
1 | |
Primes (hard)
这个实验很多教程实现的都有问题。大多数人实现的都是上一个进程把所有东西都输入管道之后再启动子进程,即并没有实现多个进程之间并行。
要我们实现埃氏筛的管道版本。给没接触过算法竞赛的同学稍微解释一下,埃氏筛通过筛除已知质数的所有倍数,以此来得到质数。即第一轮遍历将所有 \(2\) 的倍数都筛出,第二轮遍历将所有 \(3\) 的倍数筛出,第三轮遍历将所有 \(5\) 的倍数筛出。C ++ 版本代码如下:
1 | |
这个实验要求我们把遍历改为进程,每一个进程负责筛选一个质因子。
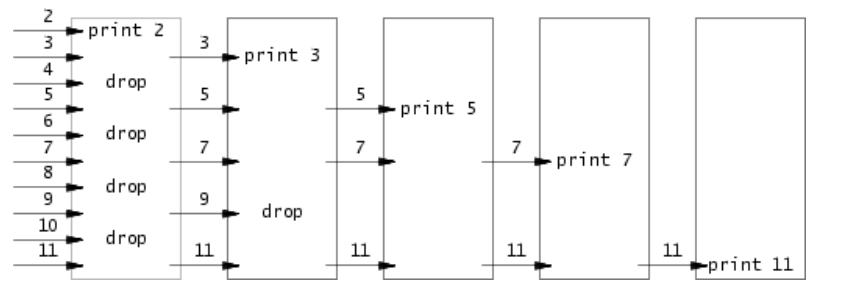
每个进程都需要一遍读取上一个进程发来的数字,同时筛选后发给下一个进程。每个进程收到的第一个质数即该进程用于筛选的质因子。可以写出如下的代码:
1 | |
find (moderate)
实现 find 程序,在特定目录下查找所有特定名称的文件。
提示中提到了 user/ls.c
目录,先看一下这个文件。一开始是一个 fmtname
函数,用于将文件名格式化为 DIRSIZ 个字符长度。之后反复使用
read 读取字节流到 dirent 结构体,并通过
fstat 函数读取 dirent 的状态到
state 结构体中。
struct dirent 定义在 kernel/fs.h 中:
1
2
3
4
5
6
7// Directory is a file containing a sequence of dirent structures.
#define DIRSIZ 14
struct dirent {
ushort inum;
char name[DIRSIZ];
};
注释中明确说了 “目录是一个包括一系列dirent结构体的文件”。并且
name 字段的大小是 DIRSIZ,这也解释了为什么要用
fmtname 来格式化字符串长度。
struct stat 定义在 kernel/stat.h 中:
1
2
3
4
5
6
7
8
9
10
11#define T_DIR 1 // Directory
#define T_FILE 2 // File
#define T_DEVICE 3 // Device
struct stat {
int dev; // File system's disk device
uint ino; // Inode number
short type; // Type of file
short nlink; // Number of links to file
uint64 size; // Size of file in bytes
};
结合 user/ls.c 中的相关代码: 1
2
3
4
5
6
7
8
9
10if ((fd = open(path, 0)) < 0) {
fprintf(2, "ls: cannot open %s\n", path);
return;
}
if (fstat(fd, &st) < 0) {
fprintf(2, "ls: cannot stat %s\n", path);
close(fd);
return;
}
我们不难猜出,xv6
中一切都是以文件的形式来存储的,目录、文件、设备等所有东西只不过是不同格式的文件。通过
open 系统调用打开一个目录,通过 read
系统调用不断读取目录中的内容,存储在 struct dirent
结构体中。通过 fstat 函数来识别这个文件的信息,存储在
struct state 中。通过 state 中的
type 字段查看是 目录、文件还是设备。
如果是文件,则比较 de.name
是否和给定的参数相同。如果是目录,则递归的 find
子目录。大概照着 ls.c 抄一下。
1 | |
xargs (moderate)
有时候想通过管道传递参数给不同的命令,例如
echo world | echo hello。但是我们知道 echo
并不是从标准输入中获取参数,而是从 cmd
中传递。于是就需要一个程序
xargs,将从标准输入的参数拦截下来,并通过 exec
传递给另一个命令。即 echo world | xargs echo hello
所以我们只需要从 标准IO
中读取将上一个程序的输出,并将其拼接到 cmd 参数的后面,用
fork/exec 那一套运行 cmd 即可。这题主要难在 C
语言的大便字符串上。
1 | |
sixfive (moderate) 2025
这是 2025 版的新实验。从用户参数中读取指定文件,并输出文件中所有能被
\(5\) 和 \(6\) 整除的数字。一个合法数字应该由
"-\r\t\n./," 这 \(7\)
个字符分割。即 xv6 中的 \(6\) 不是一个合法数字,但 /6
中的 \(6\) 为合法数字。
没啥好说的,直接 read/write 完事。
1 | |
memdump (easy) 2025
要实现有点类似 printf 的一个东西,通过解析
fmt 字符串,按照特定的格式解析
data,并输出。注意指针之间的转换即可。
1 | |
exec (moderate)
给之前实现的 find 程序新增一个 -exec
标志,将找到的每一个文件名分别作为参数传递为 exec
。也没什么好说的,细心处理 fork/exec 即可。
1 | |
Lab2 syscall: System Calls | 系统调用
这一章开始就正式进入内核开发。第二章主要是实现新的系统调用。
根据课程官网的要求,需要阅读完教材的第二章\(Operating \space system \space
organization\)。并且读懂下列源代码:kernel/proc.h,
kernel/defs.h, kernel/entry.S,
kernel/main.c, user/initcode.S,
user/init.c, 简略了解kernel/proc.c,
kernel/exec.c。
写这个 Lab 之前先总结一下 xv6 系统调用的过程。
用户进程中的系统调用实现在 user/usys.S
中。将系统调用号存放在 a7 寄存器中,执行 ecall
指令进入内核态。通过一系列 trap 指令将寄存器放入
trapfram->a7 中。
以 fork 为例,user/usys.S:
1
2
3
4
5.global fork
fork:
li a7, SYS_fork
ecall
ret
之后调用 syscall() 函数(见
kernel/syscall.c),从 trapfram->a7
中取出系统调用号,并通过一个函数指针数组调用对应的系统调用实现。
kernel/syscall.c: 1
2
3
4
5
6
7
8
9
10
11
12
13
14
15
16
17
18
19static uint64 (*syscalls[])(void) = { ... };
void
syscall(void)
{
int num;
struct proc *p = myproc();
num = p->trapframe->a7;
if(num > 0 && num < NELEM(syscalls) && syscalls[num]) {
// Use num to lookup the system call function for num, call it,
// and store its return value in p->trapframe->a0
p->trapframe->a0 = syscalls[num]();
} else {
printf("%d %s: unknown sys call %d\n",
p->pid, p->name, num);
p->trapframe->a0 = -1;
}
}
和进程有关系统调用的实现在
kernel/sysproc.c,和文件有关的在
kernel/sysfile.c。系统调用号存储在
kernel/syscall.h。
System call tracing (moderate)
实现一个系统调用
trace mask,用于追踪特定的系统调用。
从上面的 syscall() 函数中可以看到,在
p->trapframe->a0 = syscalls[num]() 之前判断
num 是否在掩码中,如果有打印信息就可以了。
首先新建一个系统调用的存根:
- 在
kernel/syscall.h中加入#define SYS_trace 22 - 在
kernel/syscall.c中加入sys_trace的声明extern uint64 sys_trace(void);; 在syscalls数组中加入[SYS_trace] sys_trace。 - 在
user/user.h中加入函数用户态接口声明int trace(int); - 在
user/usys.pl中加入入口声明entry("trace");
总结起来就是出现系统调用的地方都抄一个 trace 上去。
根据提示,新增一个 int trace_mask 成员变量到
struct proc
中,这样就可以记录哪些系统调用是要追踪的了。同时将
kernel/proc.c 中的 fork 中,将父进程的
trace_mask 复制给子进程。
在 kernel/sysproc.c 中新增 sys_trace
的实现,将用户参数复制到 struct proc 中新增的
trace_mask 中。
1 | |
由于需要打印系统调用的名字,我们照 syscalls 数组抄一个从
系统调用号 映射到 系统调用名字
的数组。
1 | |
然后在 syscall 函数修改为如果有掩码就输出信息即可。
1 | |
Sysinfo (moderate)
先按照上一个任务的方法加入一个 sysinfo 系统调用. 这里在
kernel 文件夹下再写一个 sysinfo.c 来实现这个系统调用. 在
Makefile 的 OBJS 加入
$K/sysinfo.o \(因为我在sysinfo.c中实现,所以要链接这个文件。如果直接在kernel/proc.c中实现就不用).
看filestat()函数能得知copyout函数的功能,加上sys_fstat()中虚拟地址是从a0读出来的。所以很容易能写出下面代码。
sysinfo.c: 1
2
3
4
5
6
7
8
9
10
11
12
13
14
15
16
17
18
19
20
21
22
23
24
25
26
27
28
29
30
31#include "types.h"
#include "riscv.h"
#include "defs.h"
#include "date.h"
#include "param.h"
#include "memlayout.h"
#include "spinlock.h"
#include "proc.h"
#include "sysinfo.h"
extern uint64 freemem();
extern uint64 num_proc();
uint64
sys_sysinfo(void) {
struct sysinfo info;
struct proc *p;
uint64 va;
info.freemem = freemem();
info.nproc = num_proc();
p = myproc();
if (argaddr(0, &va) < 0)
return -1;
if(copyout(p->pagetable, va, (char *)&info, sizeof(info)) < 0)
return -1;
return 0;
}
然后是freemem()和num_proc()。
在kernel/kalloc.c中添加,看一下前面的kalloc()函数,在看一下struct kmem。
1 | |
其中freelist是一个链表,存储所有空闲内存页面的地址。所以我们只需要遍历这个链表,每一项都加上PGSIZE即可。
freemem: 1
2
3
4
5
6
7
8
9
10
11uint64 freemem() {
struct run* r;
uint64 tot = 0;
acquire(&kmem.lock);
for (r=kmem.freelist; r; r = r->next)
tot += PGSIZE;
release(&kmem.lock);
return tot;
}
然后看一看 kernel/proc.c 中的 procdump
函数可以知道,proc
数组中存放的是所有进程控制块的地址,所以遍历 proc
即可。
在kernel/proc.c中添加: 1
2
3
4
5
6
7
8uint32 num_proc() {
uint32 tot = 0;
struct proc* p;
for (p = proc;p < &proc[NPROC];p ++) {
if (p->state != UNUSED) tot ++;
}
return tot;
}
Attack xv6 (moderate) 2024
这个实验中,kernel/vm.c 以及
kernel/kalloc.c 中的 memset
都被注释了,即释放、申请内存时,新内存会存储之前内存的值。这允许我们通过一些手段得到其他进程的信息。
先从 user/attacktext 中进行分析。首先父进程调用第一个
fork 来创建子进程 \(1\),通过 secrect
函数向某块内存写入一句话。之后立刻调用第二个fork 创建子进程
\(2\),通过 attack
函数尝试得到这段话。
再分别看看 secrect.c 和
attact.c。attack.c
即我们要实现的东西。secrect.c 首先通过 sbrk
系统调用申请了 \(32\) 页新内存,并在第
\(9\) 块页面的起点写了一条提示语句: "my
very very very secret pw is: ",最后紧跟着写入一条密码。
user/secrect.c: 1
2
3
4
5
6
7
8
9
10
11
12
13int
main(int argc, char *argv[])
{
if(argc != 2){
printf("Usage: secret the-secret\n");
exit(1);
}
char *end = sbrk(PGSIZE*32);
end = end + 9 * PGSIZE;
strcpy(end, "my very very very secret pw is: ");
strcpy(end+32, argv[1]);
exit(0);
}
由于 secrect 和 attack
中间并没有其他进程产生,也没有任何内存申请,所以子进程 \(2\) 中很大概率能分配到 attack
中释放的内存。
所以我们可以在 attack
中申请大量的内存页,然后遍历这些内存页,看看哪个页的开头有那句提示词,然后偏移
\(32\) 个字节即为密码。
需要注意的是,每一页的前 \(8\)
个字节在 freelist 中是用来存储 struct next *r
的,所以我们要从第 \(9\)
开始匹配。如果全部匹配的话,似乎会匹配到 .rodata
段,然后偏移 \(32\)
的位置是脏数据。
1 | |
当然,也有一些大佬硬分析出来了这一页会被分配在第 \(16\) 页的位置。可以参考 这篇博客。
Sandbox a command (moderate) 2025
新增一个 sandbox
系统调用,禁止掩码对应的系统调用执行。
大概就是 trace 实验的改版,把输出修改为
continue 即可。注意这个实验有两个参数 mask
和filename,但是我们暂时只用得到第一个参数。
kernel/sysproc.c 1
2
3
4
5
6
7
8
9
10
11
12
13
14uint64
sys_interpose(void) {
int mask;
char path[MAXPATH];
struct proc *p;
argint(0, &mask);
if (argstr(1, path, sizeof(path)) < 0)
return -1;
p = myproc();
p->interpose_mask = mask;
safestrcpy(p->interpose_path, path, sizeof(p->interpose_path));
return 0;
}
kernel/syscall.c 1
2
3
4
5
6
7
8
9
10
11
12
13
14
15
16
17
18
19
20
21
22
23void
syscall(void)
{
int num;
struct proc *p = myproc();
num = p->trapframe->a7;
if(num > 0 && num < NELEM(syscalls) && syscalls[num]) {
// Lab 2 - Sandbox a command
// Check the mask to ensure the process can run the system call
if ((p->interpose_mask >> num) & 1) {
p->trapframe->a0 = -1;
return ;
}
// Use num to lookup the system call function for num, call it,
// and store its return value in p->trapframe->a0
p->trapframe->a0 = syscalls[num]();
} else {
printf("%d %s: unknown sys call %d\n",
p->pid, p->name, num);
p->trapframe->a0 = -1;
}
}
Sandbox with allowed pathnames (easy) 2025
用上文提到的 filename 参数,如果 open 和
exec 的 pathname
匹配,则运行该系统调用执行。
没啥好说的,用 argstr
从用户空间拷贝出来,比较一下即可。
1 | |